Showing posts with label quilt. Show all posts

Tuesday, April 3, 2012

Tumbling Skulls


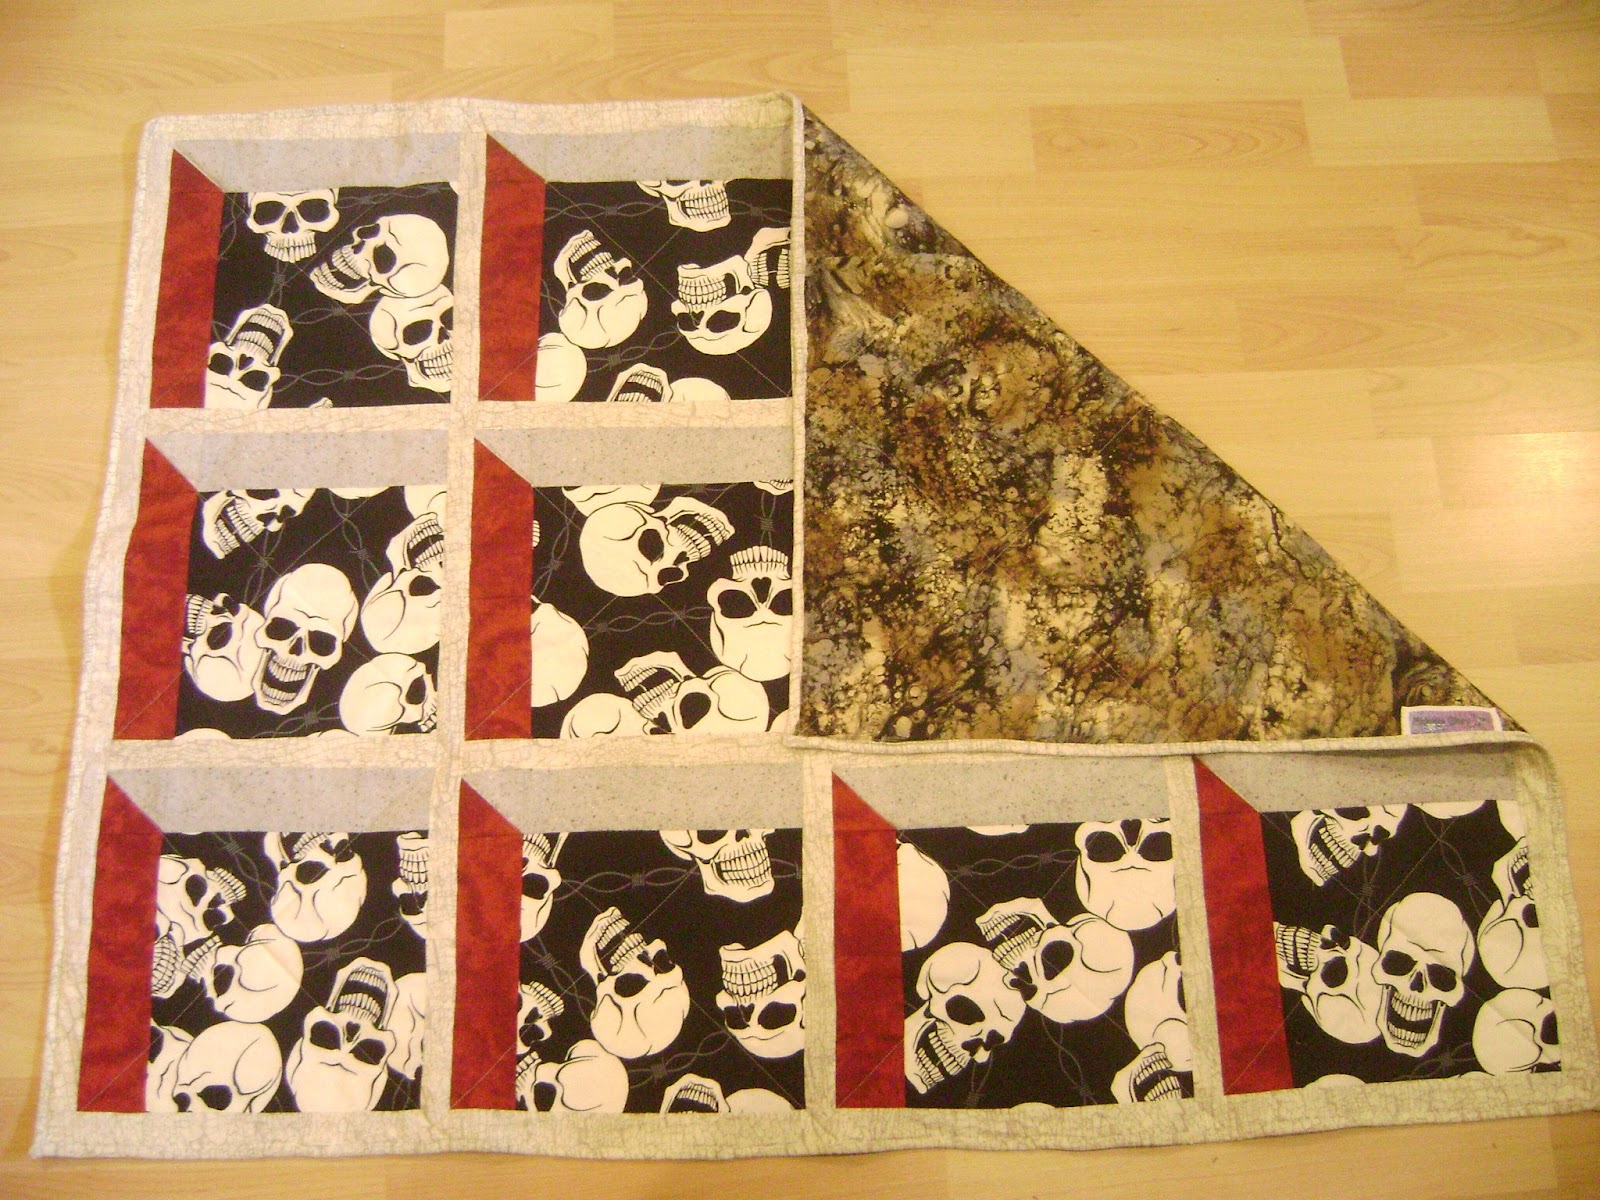
The lady who works at the consignment store I went to the other day said they were looking for baby quilts with skulls. Hey, I thought, I can do that! I went home and looked in my stash O’ fabrics and found some skully fabrics I’d gotten a long time ago. I don’t like to use skulls so much myself, but my husband? He loves them. So a few years ago we made a quilt together, which he designed and I constructed. And then I made him another one a couple years after that. As a result, I have skullish fabrics that needed new projects!
I made this one:

It uses a fairly traditional design, called Attic Windows, which creates an awesome 3-D effect. I love the way fabrics influence each other. The red, for example, looks more vibrant next to the grey, and they grey still has some depth because it’s next to a strong color (rather than white for example).
Here’s a close up:


And for the backing I wanted something different, but still uncommon. I found a length of this faux batik fabric in metal colors and decided to go with it. Here’s a close up of that:


And how they work together:

I brought this piece, and a few others, to the store, and the lady took them all. Hey! My stuff’s in a store! (I know, it may not sell, but still, I’m excited)

Wednesday, March 21, 2012

Braaaiiin!

It's been a long time since I posted here; life's kind of gone sideways for a while. But things are better and here I am, posting about a recent project which was unusual for me, quite challenging, and very rewarding.

A few weeks ago, I was presented with a challenge. I was asked to make a couch quilt for my cousin, for her birthday, and honoring the work she’s doing as a post doctorate in neurology. Her husband asked if I’d be willing to make a brain-themed quilt. A quilt? A present for my cousin? A challenge as a quilter? Of course, I said yes. He looked on line for some inspiration pictures, and sent them to me. When I said I don’t know how to translate the pictures into patchwork, he assured me I’d do a great job and left me to it.

Ok, so the first step was to enlarge a picture of a brain, to a size that might work for a centerpiece of a quilt. This is not as easy as I thought it would be.  I cropped the image into three overlapping parts, magnified them as much as my printer would allow, then went to a photocopy store and had them enlarge them further, making sure the three cropped images still line up properly:


Next I pondered the type of fabric to use for this brain. I looked at my fabric wall as I am still trying to whittle down my collection, and I tried several combinations, but soon enough I settled on some batiks I had. I traced the brain sections onto the batiks, and soon realized I would need to hand sew them with all those curvy lines. Here they are before the sewing:


For the next step I decided to applique the brain onto a square. Now this is highly, highly unusual for me. I am not fond of applique, nor do I think I am particularly good at it, but for this, well, the thought of piecing the brain into a fitted background just seemed too hard. I appliqued the patchwork brain using a tight zigzag stitch and was really pleased to realize I could use the same stitch to add more detail to the patchwork brain. Like so:


And voila! The center piece was done. I sewed a border around it, and then two more borders around that, and set to create the outer border.  And this step took me a while to figure out. The original idea included images of neurons and I looked at many images, but it is beyond my skill to actually create a patchwork neuron block. Finally I used printable fabric sheets (kind of a cop out, but it worked). I printed images of neurons off the web, set the ink as best as I could, and sewed them into square blocks.
Here are some examples:


I alternated the neurons with blocks with centers of the dark blue batik quilts. I thought it added…balance.
The final touch was appliquéing a black puzzle piece onto the brain, to symbolize my cousin’s work. And the letters embroidered are CRF, which is what she’s working on, more specifically.
Here’s the finished piece:


I mailed it to my cousin’s husband and he surprised her with it tonight. Success!

Saturday, December 31, 2011

Quick Quilt

A few weeks ago I was contacted by a lady who invited me to participate in a craft fair in the area. She'd seem my stuff online and thought I might like to try and sell them at the fair. I'd never done a craft fair before (as a seller) and was pretty excited. I asked around and everybody said to bring smallish items as many people will admire large, complex quilts, but few if any will buy them. What they'll buy is items that are inexpensive. So I set about creating some items that were not difficult, complex, or too time consuming, to sell at the fair. I made several sets of place mats, which I love, and also wanted to have some baby/lap quilts available.
In keeping with my 2011 sewing resolution, I wanted to use up my fabric, and avoid buying new fabric, so I stood in front of my wall o' fabrics for a while and let my eyes wonder over the fabrics, looking for possible combinations. This is kind of like looking at an optical illusion image; if I look too closely I miss it, but if I "skim" over the surface, patterns and connections jump out at me.
I ended up making two quilts from fabrics gifted to me by my cousin-in-law, Debbie, in combination with fabrics I already had. One is this:
Close up, you say? Sure!


Debbie had gifted me about 10 yards of the "Cars" fabric, and this is the second item I've made from it. The pattern here is a disappearing nine patch, which I use repeatedly. In this quilt, I used only three fabrics so the pattern is much more consistent than in the "random" ones I have made.
The second quilt uses a very (very) colorful fish fabric and I wanted it to be super colorful, but also have a consistent design to tie it all together.
And a close up:


The design is pretty simple, but the color combination makes the whole thing "pop". Truth be told, it might "pop" a bit too much, for my taste, but I do like the color combination.
Both of these were fairly quick to make and I had them done in time for the fair. Sadly, neither one sold and so now they go on Etsy. I hope they'll find a home soon...

Sunday, December 18, 2011

Bat Mitzva Quilt

My younger daughter’s Bat Mitzva was this summer. For me, this is a reason for a quilt; it’s also a reason for many other things, but over the years I’ve made kids quilts when they’re born, sometimes when they move into “big kid” beds, and now Bat Mitzvas. This is the fourth Bat Mitzva quilt I’ve made and, as before, this one presented a unique challenge. The challenge with a quilt for a 13 year old is mostly in the design. How do create something that she will like now, and with which she’ll keep growing and that will keep being true to who she'll become. If baby quilts are about the adults as much as the babies, quilts for teens are about the kid, and the adult that teen will become.  I pondered and pondered and could not find a pattern I liked for this one. She’s got such contradictions in her personalities! It’s wonderful in a person and can create difficulties in quilt design.

So, in the end, I asked her what she’d like. She didn’t know but asked to look through my quilt books. This struck me as wonderful! My child, looking into her future, looking at images of the past for ideas. I also used this as a chance to hang out with her, and talk for a bit, over several days, which is a joy.
In the end she picked, to some surprise on my part, an Amish design. She did ask to change the colors a bit though, asking for blues, greens and greys, on a white background. Further, she wanted no fabric with pattern or design on it. Hmm…Challenging. My first step was to buy fabrics of different hues of the colors she wanted and cut them into squares:


I also cut squares of the same size in white fabric. Next I sewed the colors and white into these squares. I did it by putting two squares together and sewing two lines, each one ¼ of an inch from the center, on either side, then cutting them and pressing them open. Like so:


This process actually took me quite a while. I’ve lost count by the end, but at some point I counted 500 squares (that’s  a LOT of squares!)
And then I put them all together, working the pieces for maximum random effect:


Now that it’s cold enough my daughter finally has it on her bed, and that is where we took the picture. She even made her bed so I could take a decent picture:

The lighting in the room is messing with the colors a bit, but you get the idea...

Wednesday, November 9, 2011

Purple Doodle


In keeping with my monochromatic doodling endeavors, here’s a picture, or two, of another quilt, this time in purple.

The design is my trusted disappearing nine-patch. I love this pattern! It is so versatile and easy. And the trickiness of it is that it looks so random. It keeps the eye wondering along it, looking for repetitions and patterns. I find this pattern dynamic, and relaxing all at the same time. And I think it’s even more so with the monochromatic palette I’ve been playing with recently.

Here’s a close up-can you tell where the blocks are?

And here’s the back.


Next up-two flannely quilts for colleagues expecting babies in the next month or so.
Also, coming soon, pictures of my daughter’s Bat Mitzva Quilt, which I’ve finished but have yet to photograph.

Wednesday, October 26, 2011

Baby Quilt

My friend Karen is about to have a baby. Like any new mother-to-be, she is both excited, and nervous, and researching, and accumulating. It was not hard to figure I'd make her a baby quilt. What was more difficult is figuring out the colors and designs. Karen likes to wear black, and her baby shower was Nightmare Before Christmas themed. Right, so black and spooky it is, right? Maybe not. The big mystery with these things is in how the parents will bring up the kid. Dark and Spooky? More mainstream? Is this quilt for the Mama, or the baby? Also, I wanted to take the Dad's interests into account, and he's a professional car racer. Clearly, I needed to think about this. So I did. And then I decided to make the quilt reversible. And then I started sewing.
But first, the design. I saw a photo of an interesting design and set about deconstructing it (ah, the joy of graph paper drawings!). The design was harder than it first looked so this took me a while. But finally, I had it, and it was time to start cutting fabric.
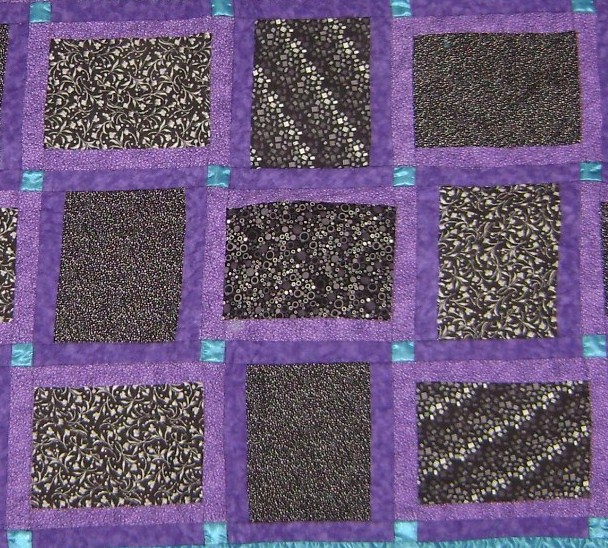
One side of the quilt looks like this:

The design here of black patterned fabrics and purple sashing looked too dark when I was laying it out on my floor. I needed something to make it "pop". I looked and looked at my shelves of fabric and finally decided on blue taffeta. Not only is the taffeta lighter in shade, but it also has a sheen to it. Here's a close up:

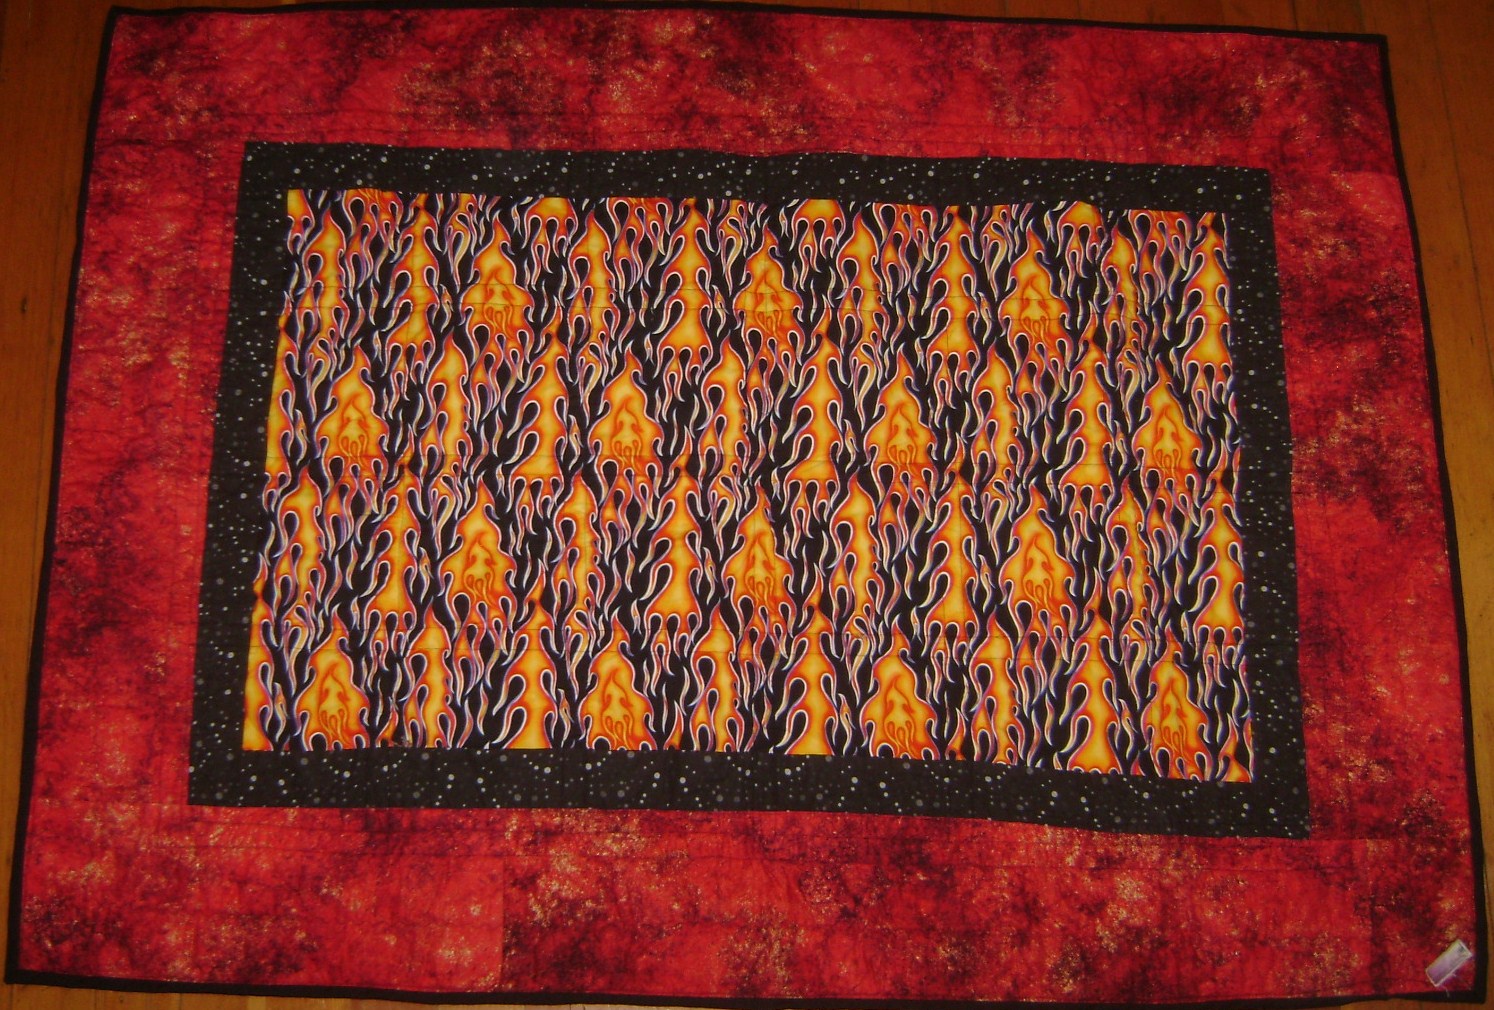
Stepping back from this pieced top, it did look awfully dark and spooky, and so the other side needed to be brighter. Now it may be just me, but car racing goes with flames, and I just happened to have flame fabric so...here is the reverse:

The finished product is 42 x 59 inches and will be something that the baby can use as he grows. So for now it's for Mama and Dad, but later, I hope the kid will use it for himself.
I gave it to the parents-to-be this past weekend, so now I can post about it!
And onward we go.

Wednesday, October 12, 2011

Monochromatic doodles

I've often thought that quilting, or rather, piecing, is like painting with fabrics. I enjoy using different color fabrics to create images. I like to think of color combinations, the composition of the piece, and the balance of things.  I enjoy the process of designing the piece, and then seeing it come together as one, cohesive piece.
So, of course, in my need to challenge myself, I decided to try for a monochromatic piece. The challenge here was finding a way to put together different fabrics not only of the same color palette, but of the same color. Granted, each fabric had a different pattern on it, yet it was still an interesting process. First I considered my ever-trusty strips. However, I quickly got past that one as it seems I've done many strip pieces recently. Then I thought of a disappearing nine-patch (one of my favorite piecing designs), but, again, I've done several of these and wanted something new.
And then, I saw a photo in a quilting magazine, and decided to try it. This is a design that has 4 different blocks, in various strip and square combinations, and I thought it would work well for a monochromatic doodle in fabric. I only had the photo of this quilt and so I spent some happy time, with my graph paper, deconstructing the piece and figuring out how to measure, cut and piece the various fabrics.
This made me happy.
I then went to my stash and found some fat quarters, and other remnants, of enough green fabrics to put together, and created this:

And a close up:
So some of the blocks are of 3x3 squares, arranged in a nine-patch. Some are of three strips (3x9) and some are of 3 shorter strips and one longer one. The fourth kind of block is a four-patch of larger squares. Altogether they make up a lively jumble of fabrics and patterns. The different blocks arranged in non-consistent ways make me think of this as a doodle.
Next up-a purple monochromatic piece, though I haven't decided whether to make it with this design, or in the disappearing nine-patch.
So many options for painting with fabric!

Wednesday, September 28, 2011

Donation Quilts


I make quilts for fun, really, and for trying out new things.  I like to give them to people, sure, but I often make them without a specific recipient in mind.  A few years ago there was a dearth of new babies in my family and immediate circle of friends. There were no big milestone-type occasions for me to plan a quilt around. So I started looking around for places to which I could donate quilts.  The first place I found was Quilts For Kids, which was mentioned to me on an online community to which I belong on LiveJournal. Quilts for Kids is a nation-wide organization which distributes quilts to children’s wards and NICUs in hospitals across the nation.  Their quilt donation method is great: they give you cut fabric for a top and more fabric for the backing, with instructions on how to layout and sew the fabric, and then you piece it, provide batting, and quilt the whole thing together. You mail it back to the organization. Ordering a kit is easy and the patterns are too. The main thing is to add color and comfort to kids in hospitals. This is a worthy cause to which I have been contributing pretty regularly. I’ve made several quilts for them, and have posted about one of them here: http://quiltjourneysofmidnightglory.blogspot.com/2011/04/donation-quilts.html

A few months ago I was perusing the Quilts for Kids website and noticed that there is a local chapter of the organization, in San Francisco. The organization encourages people to work with local chapters as that enables them to contribute to local hospitals, etc. I contacted Patti, who runs the local chapter and learned that she does things a bit differently. She asks people to make a top and then she provides batting, backing and quilting. She’s got a long arm machine (over which I admit I am jealous). I like this idea. It lets me play with color and design, and experiment on new techniques, etc. and STILL be able to donate the quilt.
Right now Patti is working with the Ronald McDonald house in SF, which provides housing for kids who come here for treatment and their parents. Unfortunately, Patti told me, the House has some returning kids, teenage boys who have had a recurrence of cancer. I immediately set about to make a quilt for one of the boys. Now teenage boys often have specifics likes, dislikes and ideas about what befits a boy/young man. I looked in my stash and pondered and pondered (and bought a couple of brown fat quarters), and finally came up with this:


The design is called “Warm Wishes” and is one which I’ve used, and about which I’ve blogged here, before. It is an extremely versatile design. Every quilt I’ve made using this design has a totally different feel. Consider these:

In any case, I made this one in blues, green, and browns, and shipped it off to Patti. She finished it, and gave it to the House. I am glad it found a good home, and glad to cheer somebody in need, and so thankful that my hobby can be useful and meaningful to others. I’ve already started planning the next one, though it’ll have to wait a bit.
Here is the picture of the finished quilt for the Ronald McDonald House in SF:

If anybody reading this is interested in contacting Quilts for Kids, the link is at the bottom of my blog page.

Saturday, September 17, 2011

In the name of Research!

A quilter and librarian posted the following on an online community of which I am a member (on LiveJournal). She's doing research on quilt-related bloggers and their readers.
Dear (few, select) readers, if you have a moment or 5, please help the lady out. Thanks!

If her link doesn't work here, try this: http://knowltonian.net/quilt/

Begin her request:

Help a librarian and quilter! You could win Storyboek fabric from Birch Fabrics.
Take the quilt survey and you could win!
Hi!

Dear Quilters,

I am a quilter and librarian at the University of South Alabama. I am working on a research project involving the information-seeking and community participation habits of quilt bloggers and their audience. In plain English, that means I am administering a survey designed for quilt bloggers and their readers with questions regarding things such as where they look when they are looking for information about quilting, whether they participate in in-person communities such as guilds, etc. The survey will run from 9/15/11 to 10/15/11.

I am studying this because I love quilting and I love learning about information-seeking habits. Since research and publication are required for tenure at my university, I am also hoping to be able to publish an academic article based on the survey. I also think that quilt guilds, bloggers, and librarians would benefit from this research.

It would really help me out if as many quilters as possible took the survey. To sweeten the pot, one lucky survey participant will win fat quarters of Birch's Storyboek fabric. The winner will be selected randomly from survey participants.

The confidential survey has 26 questions and should take at most 30 minutes. This study has been approved by the Institutional Review Board at the University of South Alabama.

Take the quilt survey and you could win!

Thanks!

Ellen K. Wilson
Instructional Services Librarian
University Library, University of South Alabama
ewilson (at) jaguar1.southalabama.edu

Wednesday, September 14, 2011

Halloween!


I love Halloween.
I do. I love it. I love the silliness, and the spookiness (and candy, of course, candy). I love dressing up for it and the kids getting dressed for it. When they were little I made their costumes, though at some point that stopped being cool for them. I still think it’s cool. I dress up at work, more than my students do, in fact. 
I also like it because it’s the time of year when many stores suddenly carry items I like. I like them all year but they are often hard to find in other seasons. Things that have to do with ghosts and cemeteries, and skulls which my husband likes a lot. And stripey tights. Let’s not forget those.
At this time of year the fabric stores carry all sorts of Halloweenish material, and when I was last at the store, I saw cute fabrics and, getting caught up in the Halloween mood, I bought some:
Seriously, how could I resist those sparkly bats? And that crazy looking vulture??
 
So I got the fabric and then I set about making some wall hangings. I made this one for us:
And the flip side? My “Quilting Bees” fabric so I can hang it up in my sewing room when it’s not in Halloween mode.
Then I also made this:


And this one has masks on the reverse. I have posted it on Etsy and maybe somebody else will get as much joy out of it as I do.
The small piece is basically a four-patch while the larger one is a nine-patch (the only difference is the pieces are rectangles as opposed to the traditional squares). I have used sashing in both to bring out the main fabrics, especially the cemetery one. And the whole thing is bordered with a purple patterned fabric. These pieces are super-simple in design so as to emphasize the fabrics. I made loops out of ribbon so they can be hung on dowels or with tacks or pins.
 
These were quick and gratifying, and a lot of fun.

Now back to my regularly scheduled challenging quilts…